Getting Started with Bassi Logic.
Bassi Logic™ is a monumental leap in heat treated rotary nickel titanium files. It’s advanced design and a single-file system make it unmatched in speed for instrumentation according to multilpe studies.
Bassi Logic Methods
Before clinical use: The illustrations on this site and brief instructions for introductory purposes. Consult the complete IFU and practice with the Logic files in extracted teeth and plastic blocks before clinical use.
Rotary 4-step Method
This is the recommended technique working with Bassi Logic. The prepare is conservative, fast and yet familiar.
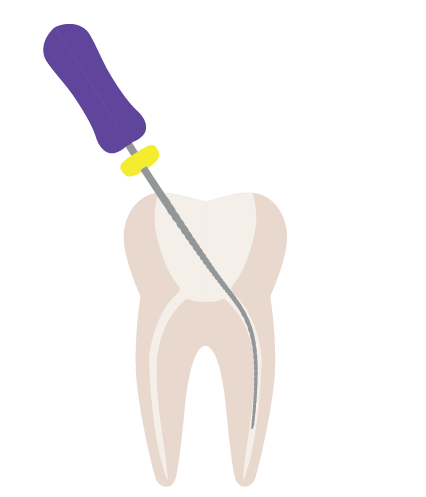
Step 1- Navigate 2/3 Thirds of the canals with a K10 File.
Step 2 – Achieve Patency with a Glidepath.
Step 3 – Shape the Canal with a corresponding size Shaping file.
Step 4 – Irrigate and clean the Canal with Bassi Clean.
4 Step Method Details
Step 1 – K-File
Begin with a K10 file in the first two thirds of the canal. Irrigate after each file change.
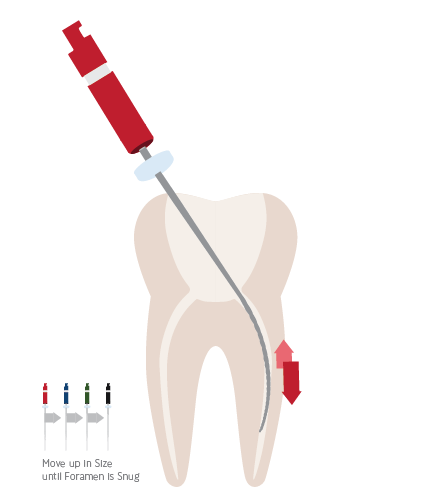
Step 2 – Glide Path & Total Working Length
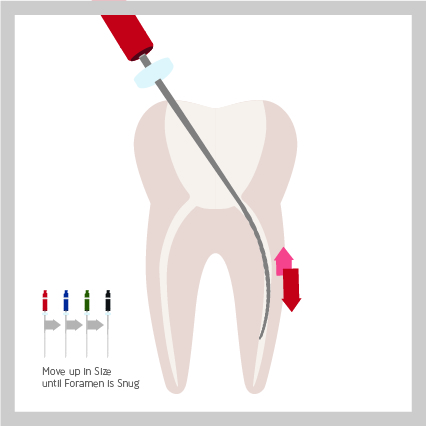
Canal anatomy dictates the Glide Path file chosen: Most teeth with relatively uncomplicated anatomy require the 25/.01 Glide Path file. All Glide Path files, including the 25/.01 are inserted with a gentle and slow pecking motion to the Total Working Length (TWL).*
Tips
If desired, larger Glide Path files (30/.01, 35/.01, 40/.01) can be chosen to prepare a glide path in larger canals using a gentle pecking motion to TWL.
* If the chosen Glide Path file will not reach the apex, prepare the Glide Path manually and/or prepare the glide path with hand files in combination with the .05/15 Bassi Logic™ file. This file is used with a gentle apical insertion and lateral brushing motion on withdrawal. Do not attempt to force the file apically to achieve patency.
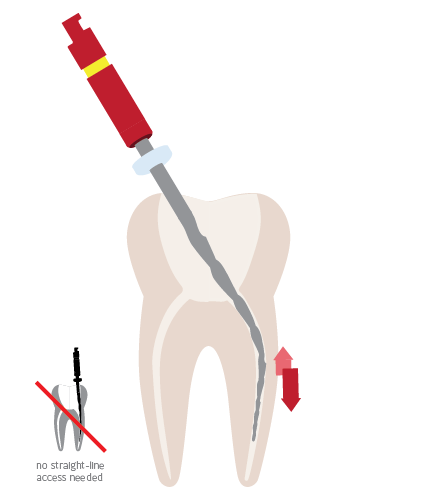
Step 3 – Shaping the Canal
Insert the Shaping file corresponding to the Glide Path file used above. For example, if the 25/.01 prepared the glide path, the 25/.05 Shaper is inserted with a gentle pecking motion for final canal shaping. If the 30/.01 Glide Path file was used, the 30/.05 Shaper is used, etc.**
Tips
Brushing Bassi Logic™ Shaper files against the thickest root wall (away from the furcation) can prepare a greater canal taper and/or enlarge the orifice if desired.
**If the clinician wishes to prepare a larger apical diameter, the 30/.01, 35/.01, and 40/.01 Bassi Logic™ files can be used.
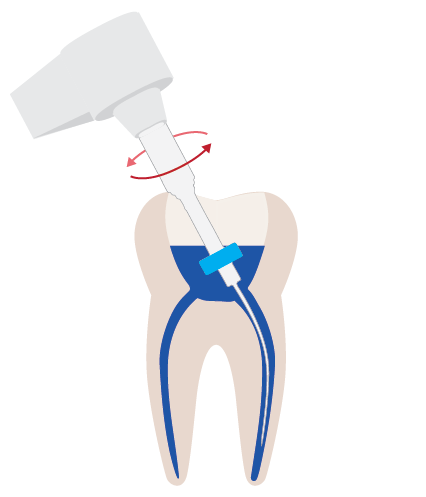
Step 4 – Irrigation
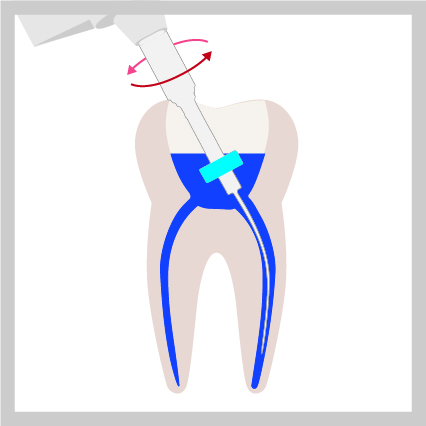
After canal preparation, insert the Bassi Clean™ irrigation file to TWL and rotate (or reciprocate) in sodium hypochlorite and again in liquid EDTA for a minimum of 30 seconds each,optimally more.
Manual 3-Step Method
For those who wish to not use rotary file for glide path, this method is an excellent choice.
Step 1- Use K10 file to working length and achieve patency.
Step 2 – Shape the Canal with a Logic Shaping file.
Step 3 – Irrigate and clean the Canal with Bassi Clean.
3 Step Method Details
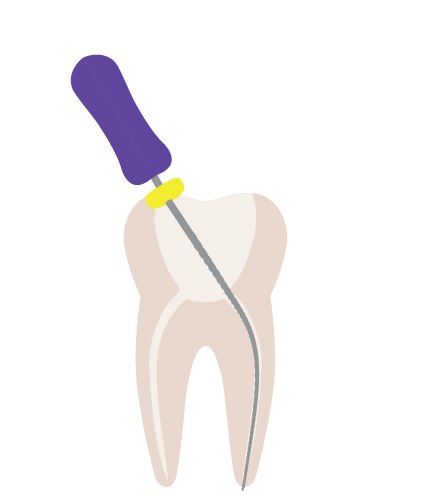
Step 1 – K-File To Total Working Length
For manual instrumentation, begin with a K10 or K15 hand file until patency is achieved.
Step 2 – Shaping the Canal
Insert the Shaping file corresponding to the Glide Path file used above. For example, if the 25/.01 prepared the glide path, the 25/.05 Shaper is inserted with a gentle pecking motion for final canal shaping. If the 30/.01 Glide Path file was used, the 30/.05 Shaper is used, etc.**
Tips
Brushing Bassi Logic™ Shaper files against the thickest root wall (away from the furcation) can prepare a greater canal taper and/or enlarge the orifice if desired.
**If the clinician wishes to prepare a larger apical diameter, the 30/.01, 35/.01, and 40/.01 Bassi Logic™ files can be used.
Step 3 – Irrigation
After canal preparation, insert the Bassi Clean™ irrigation file to TWL and rotate (or reciprocate) in sodium hypochlorite and again in liquid EDTA for a minimum of 30 seconds each,optimally more.
Conservative 2-Step Method
Experienced Bassi Logic users have found that glidepath, and shaping can be accomplished in a single step by utilizing the 15/03 or 15/05 Logic Glidepath files there are known as “The Joker”
Step 1- Using the 15/03 or 15/05 Glidepath (also known as “the Joker”, achieve patiency and shape the canal.
Step 2 – Irrigate and clean the Canal with Bassi Clean.
2 Step Method Details
Rotary Instrumentation
Step 1 – Glide Path, Shaping & Total Working Length
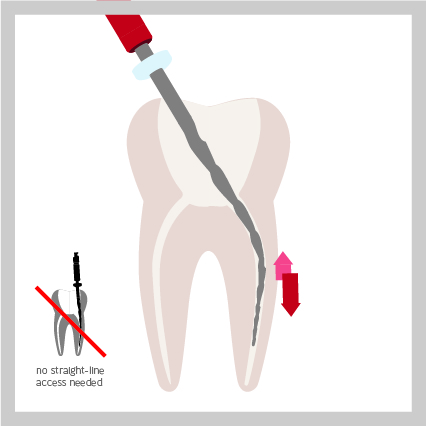
Depending on anatomy, use the 15/03 or 15/05 Logic Glidepath files inserted with a gentle and slow pecking motion to the Total Working Length (TWL) and to shape the canal in a single step*
Tips
* This file is used with a gentle apical insertion and lateral brushing motion on withdrawal. Do not attempt to force the file apically to achieve patency.
Step 2 – Irrigation
After canal preparation, insert the Bassi Clean™ irrigation file to TWL and rotate (or reciprocate) in sodium hypochlorite and again in liquid EDTA for a minimum of 30 seconds each,optimally more.
Bassi Logic Clinical Steps
Before clinical use: The animations on this site and brief instructions for introductory purposes. Consult the complete IFU and practice with the Logic files in extracted teeth and plastic blocks before clinical use.
2. Create the Glide Path
Step 2 - Glide Path & TWL Details
Canal anatomy dictates the Glide Path file chosen: Most teeth with relatively uncomplicated anatomy require the 25/.01 Glide Path file. All Glide Path files, including the 25/.01 are inserted with a gentle and slow pecking motion to the TWL.*
Tips
If desired, larger Glide Path files (30/.01, 35/.01, 40/.01) can be chosen to prepare a glide path in larger canals using a gentle pecking motion to TWL.
* If the chosen Glide Path file will not reach the apex, prepare the Glide Path manually and/or prepare the glide path with hand files in combination with the .05/15 Bassi Logic™ file. This file is used with a gentle apical insertion and lateral brushing motion on withdrawal. Do not attempt to force the file apically to achieve patency.
3. Shape the Canal
Step 3 - Shaping the Canal Details
Insert the Shaping file corresponding to the Glide Path file used above. For example, if the 25/.01 prepared the glide path, the 25/.05 Shaper is inserted with a gentle pecking motion for final canal shaping. If the 30/.01 Glide Path file was used, the 30/.05 Shaper is used, etc.**
Tips
Brushing Bassi Logic™ Shaper files against the thickest root wall (away from the furcation) can prepare a greater canal taper and/or enlarge the orifice if desired.
**If the clinician wishes to prepare a larger apical diameter, the 30/.01, 35/.01, and 40/.01 Bassi Logic™ files can be used.
4. Irrigation
Step 4 - Irrigation Details
After canal preparation, insert the Bassi Clean™ irrigation file to TWL and rotate (or reciprocate) in sodium hypochlorite and again in liquid EDTA for a minimum of 30 seconds each,optimally more.
Technique Videos
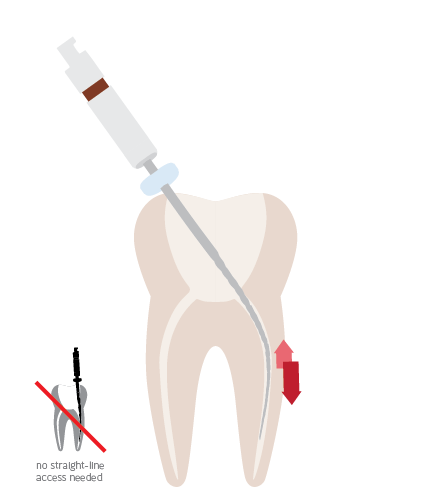
Achieving Patency
Achieving patency by reaching the apical foramen in the final third of the root canal is crucial to maintaining cleaning efficiency in the clinical procedure. In the following video learn how to achieve patency using K-Files or Logic Glidepath files.
Retreatment
Step-by-step instruction on using Bassi Logic files for Retreatment. Bassi Logic Retreatment provide unique advantages, as they are designed to remove 90 percent of the gutta-percha without the use of solvents.
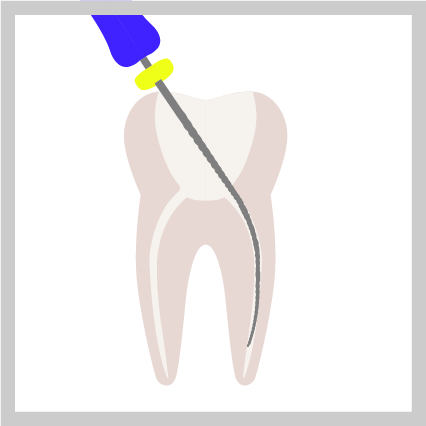
Clearing Obstructed Canals
with “The Joker” 15/.05
Occasionally in an endodontics procedure, there are significant obstructions in a canal that impede access to the apex. In this video learn how to use the Bassi Logic Glidepath 15/05, or “the Joker” to clear the obstruction.
4 Step Method on Resin Block
Bassi Resin models are made for practice and training using the Bassi Logic files. In the following video learn how to use the 4 step method on a practice resin block with 3 root canals.
Electronic Motor Settings
Use a torque controlled endodontic motor. Refer to the rotational speed and torque settings in the chart provided below as suggested use.
Handpiece Use either an 1:1, 4:1, 8:1 or 16:1 endodontic handpiece.
350 RPM 1.5 Torque
15/.03
350 RPM 2 Torque
25/.01
30/.01
35/.01
40/.01
45/.01
50/.01
950 RPM 2 Torque
25/.03
30/.03
35/.03
40/.03
15/.05
950 RPM 4 Torque
25/.05
30/.05
35/.05
40/.05
25/.06
Instructions for Use
Instructions for Use (IFU)
Click to download
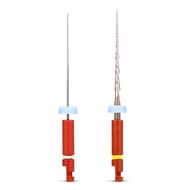
Bassi Logic™ Shaping & Glidepath Files
Testimonial Dr Hebert

“Life Changing!!…I’ve practice Endodontics for over thirty years and Bassi Logic instruments have transformed my practice, both in performance and profits:-))”
Catherine A. Hebert, DDS
Testimonial Dr Duarte

“We’ve been using Logic instruments and have conducted studies with them, and we were able to obtain very conservative results. Also, the RT instruments, both in studies and in clinical use, showed a great capacity to remove obturation, working safely inside curved canals.”
Marco Antonio Hungaro Duarte, DDS, PhD
Testimonial Dr Laperriere

“In my whole professional life, I’ve never done such fast and safe endodontic retreatments as the ones using Logic RT files. I don’t even have to use solvents! That saves me a lot of time.”
Frederico Laperriere, DDS
Starter Kits

Logic Practice Kit $0
Try Bassi Logic with a free kit of your choosing.
